Tuesday, October 2, 2012

"All Cleaned Up Roasted Pumpkin Seeds" Recipe


One of my favorite things to do in the fall is to stock up on Pie Pumpkins and save them for a rainy day! Today is not a rainy day (it's actually very sunny... and beautiful!), but I do have a couple of sick kiddos laying around the house.  So, I'm making the best of this day and cutting open my first Pie Pumpkin of the year!

When I was little we would roast pumpkin seeds with melted butter and lots of table salt.  It was one of our favorite fall pastimes & snacks.  However, now that I'm all grown up, I'm always looking for ways to make my favorite things, only healthier for the family & I... but still just as tasty & enjoyable!  So I was very excited to try roasting pumpkin seeds a new way today!

Two steps to prepare to roast your seeds:
Step One
So, first thing's first! You have to buy your pumpkin! Not sure what a "Pie Pumpkin" is? Click here!

Step Two
Okay, now that you have your pumpkin.... time to cut it open, and gut it! I love this part... I'm sick, I know. ;)  Take all your seeds and seperate them from all the guts, put them into a small strainer. And rinse!


Okay, now you're ready to roast your seeds!!


All Cleaned Up Roasted Pumpkin Seeds
Ingredients:
- Rinsed Pumpkin seeds from 1 Pie Pumpkin (about 1 cup of seeds or so)
- 2 tsp. of Coconut Oil
- approximately 1/8 - 1/4 tsp. Pink Himalayan Salt Crystals

Directions:
1. Begin preheating your oven to 300F. 
2. Line a large cookie sheet with parchment paper.
3. In a small microwave safe bowl melt Coconut Oil. 
4. Add your Pumpkin seeds to the bowl, and stir. 
5. Sprinkle salt evenly over the top, stir. 

I used Trader Joe's Pink Himalayan Salt Crystals,
and Spectrum brand Organic Coconut Oil for this recipe.
6. Spread mixture across your cookie sheet.
7. Bake for about 45 minutes. Seeds should be a light brown color when they're ready.

What your roasted seeds SHOULD look like when they're done!

*I stored mine in an air-tight container at room temp.  These should last about 2-3 days... if you don't gobble them all up in one sitting! ;)

Enjoy!

xoxo
Heidi

Sunday, September 30, 2012

Slow Cooker Apple Butter Recipe (Sugar Free!)


Well, fall is in full swing here in Washington! Last week I visited my sweet friend Amy, who took me apple picking in her yard straight from her beautiful apple tree with her!  I actually climbed to the top of the tree to get the most ripe apples I could find (this is a big deal for me... I'm a big baby about heights!).  And we picked about 30 apples for our Apple Butter making adventure.

For our first batch of Apple Butter, we followed this recipe that I found on Pinterest.  And while on the one hand it was absolutely delicious, on the other hand my nagging conscience had me stressing out about the amount of sugar that went into making this batch!  So, I set out to make our second batch without any sugar.  I searched and searched for a recipe online, but was not finding what I was looking for. So instead, I followed this guide on how to substitute sugar with Stevia, and I came up with my own spin off of the original recipe I followed.


Sugar Free Apple Butter

Ingredients
  • 13 Cups of Apples: peeled, cored, and sliced thin
  • 1 tsp Stevia Extract Powder (I used Trader Joe's brand)
  • 5 heaping Tbsp Raw Honey
  • 2 tsp Cinnamon
  • 1 1/2 tsp Nutmeg
  • 1 1/2 Cups (no sugar added) Apple Cider *you may need a little more to add to the mixture as it heats

Directions
Prepare your apples (I used a handy dandy Apple Peeler Corer Slicer!), put them in your crock pot.  Sprinkle Stevia, Cinnamon, Nutmeg, and Honey on top. Pour cider over top, and mix ingredients together. Turn crock pot on high and cook for 5-7 hours, and add more apple cider, if needed to reach desired consistency.  The butter should be boiling when you're ready to can.  I personally chose to can mine in 8oz jars. I followed the instructions in this video for canning with a water bath.

 
I love this recipe, because there's NO sugar!

However, because there is no sugar in this recipe, the consistency turns out more like an apple sauce than an apple butter (not as gewy as normal apple butter).  If you come up with a way to make the recipe without sugar (or crappy sweeteners like Splenda - yuck!) and get it to a better consistency, please let me know, I'd love to try your version!


Sunday, September 16, 2012

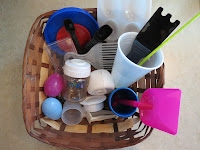
Treasure Basket: Baking

So far, I have made 2 baskets and have only used one.  So, I'm going to show you that one today.
"Baking" Treasure Basket
What's in the Basket:
  • Whisk
  • Wooden stirring spoon
  • Pot holder
  • Mixing bowl & lid
  • Paper muffin liners
  • Foil stars
  • Measuring cups (1 glass, 1 plastic)
  • 2 Measuring spoons in individual sizes
  • I added a couple more items after this picture was taken:
  • A large metal stirring spoon
  • One of those food mashers, metal with a wooden handle
Kendrick had a blast playing with this, and lasted about 30 minutes (awesome, I did not expect him to be entertained that long!) just completely intrigued with everything inside!

You can see the masher, and the spoon that I added here.
He was so into what he was doing that he didn't even notice Mommy taking pictures!

What I like about these baskets is that while Kendrick is able to explore these items and learn about his senses, I am also able to sit down and play with him, and teach him while I do.  We discuss which items are bigger & smaller.  We made music with the spoons & things.  And we (I) talked about the differences in the textures and what each thing is used for in the kitchen.

This is definitely NOT something I will leave him unsupervised with.  He still likes to explore with his mouth quite a bit, and has come up with very creative ways to use some of the things that could be dangerous.  So, I recommend if you are thinking of making something like this to make sure to monitor your children closely with these!! :) 

If you would like to learn more about Treasure Baskets, and how to make them, click here!

Thank you for reading!!

xoxo
Heidi

You might also enjoy:

Treasure Baskets:
Getting Started