Thursday, November 8, 2012

Pumpkin Pancakes

A few words about this recipe... this has one or two ingredients in it that may or may not fall into the Paleo "grey area" list.  So if you're SUPER strict Paleo, you'll have to decide whether or not this is something you'll want to try.  However, if you're like me and mostly go with the 80/20 approach, you might just find yourself using this as one of your breakfast staples!

The great thing about this recipe is that it would be easy to come up with a spin on it and change it up a bit... let me know if you do, I'd love to hear reviews!

And, without further adew, I give you....

Pumpkin Pancakes
 
 
Ingredients:
  • 4 eggs
  • 2 TBSP Maple Syrup
  • 1 tsp Pure Vanilla Extract
  • 3/4 Cup Pumpkin Puree
  • 2 TBSP Almond Flour
  • 1 tsp Cinnamon
  • 1 tsp Pumpkin Pie Spice
  • 1/4 tsp Baking Soda
  • 3 TBSP (Grassfed, duh!) Butter
  • 1/4 cup Semi Sweet Dark Chocolate Chips (optional, for garnish... if you have a big sweet tooth - like me!)
  • 1/4 cup Chopped Pecans (optional, for garnish)

Directions:
Beat eggs, maple syrup, vanilla, and pumpkin in a medium bowl.  Sift dry ingredients together seperately, and gradually add to wet. Melt butter in a frying pan, and add to batter.  Drop 1/8 cup at a time onto buttered frying pan (make sure it stays well buttered, these pancakes are delicate, and don't like to flip otherwise). Wait for the top to bubble a bit, then flip over to other side.  These only take a couple minutes each. Stack these babies onto your plate, add your toppings, and voila!

I usually have these with my Apple Butter on top, but when the kids were eating their Halloween candy, I came up with the chocolate chips version... cured that sweet tooth right up! I also like to add just a little Maple Syrup on top to give it some moisture (ew... such a gross word...).

Thursday, November 1, 2012

Changing to Paleo

Hi guys! SO, it's been a while, and a lot has changed! I apologize ahead of time for this blog post being very wordy, but I feel it's necessary... so there!  I'll try to add some interesting pictures for your enjoyment. ;)

Okay, I gotta start right from the beginning, so that you can all know where I'm coming from and what lead me to this huge change in my  A couple years ago I heard about this eating style called "Paleo" and read a book called The Paleo Solution: The Original Human Diet, by Robb Wolf

At the time, I'd just had my son, and was nursing while training for my first half marathon.  I was commited to eating clean, but had no interest whatsoever in eliminating carbs from my diet (Paleo isn't all about NO carbs, but that's kind of how I saw it with my huge addiction to those suckers)... thought the whole idea sounded great, and made sense, but could not imagine doing it myself. 
Me, looking and feeling like poo-poo, shortly after child birth.
It was around that time that I started having VERY painful stomach cramps, that would sometimes go on for hours... and ended up visiting the ER, going through every kind of testing you can imagine, etc.  Doctor visit after visit... NO answers!  All I knew was that when I ate certain foods, it would sometimes trigger the cramping, and other times it wouldn't.  And still, I didn't want to give up my carbs.  Over time I just started giving up certain foods as I realized that they seemed to be contributing to the pain.  Eventually it seemed like there was almost nothing that I could have and really enjoy... and I was putting a lot of pressure on myself to count my calories, keep sodium super low in every meal, and avoid the food that hurt my belly.  It was stressful and tiring, and a constant battle! 

About a month ago, I was planning my meals for the next shopping trip, so I could make my grocery list.  And I had a friend who'd recently gotten into eating Paleo, who'd been sharing with me some of her recipe adventures. So I decided to research some blogs to see if I could round up some new recipes for my meal plan.  I planned out a good handful of new recipes to try, and picked up the needed ingredients.  Guys, I can't tell you how DELICIOUS these recipes were, and what a nice change it was to try some new things! They were simple, yet very different from what I was used to.  I decided when I ate a Paleo recipe to forget the rules about calories and sodium levels, since it seemed to work for so many other people, and it was so incredibly freeing! I got to reading more and more over those couple of weeks, refreshing my memory about the what and the why behind Paleo eating.  And I was hooked! I was (am) completely obsessed with finding new fun recipes and trying them out. 

One of my favorite treats I baked in those first 2 weeks: Paleo Pumpkin Muffins
(I just added a few semi-sweet dark chocolate chips on top)
Click the link for the recipe!
I realized that my problem before was that I was focused on the "no-no" list... instead of looking at all the things I COULD do, and try.  And my "no-no" list with eating clean and all my food sensativities combined was becoming bigger and bigger, so at this point, switching was actually allowing me to try MORE foods and it really just made so much more sense to me. 

So, to all of you who have been following my facebook, and instagram accounts, and putting up with all my crazy Paleo posts... and wondering what the heck I'm freaking out about and why I'm so obsessed... it's because I feel freaking AMAZING, and I'm so excited now that I really understand what and why I'm doing what I'm doing for my body!  So, if you've had questions, I'm attaching some of my favorite resources to this blog, for getting started on your research!  Thanks for waiting for my explanation! I will do my best to start sharing my recipes also, as I've had so much fun playing with ideas and making new creations in my kitchen... they MUST be shared!!

I hesitate a bit to share this, because I don't want you to just see all the No-no's, like I did at first, but I feel this picture does well at explaining some of the basics.... so here you have it, keep an open mind, and please read the references I provide... or even do your own research!


Want to know more about Paleo?
 
I can't tell you how incredibly helpful this blog is. It's designed where it's easy to follow, and chalk full of practically everything you need to know about Paleo to get started!  Follow the links and prompts where it says "start here" etc. 
 
My advice is not to skip any of it, and to really read through it all with a fine tooth comb, so you can really gain an understanding of the why and the what behind the lifestyle.
 
 
Recipes
Now that I've convinced you that you need to go Paleo, just like me, you're going to need to find some good recipes.  The great thing is that I'm behind schedule with this movement, and there are already TONS of people out there making amazing blogs with their own marvelous Paleo recipes... so here's where I started:
  • PaleOMG.com - I'm sharing her blog with you first, because hers is my favorite so far, and I'm using quite a few of her recipes as my staples right now.  Since squash is in season, I recommend trying her 5-Ingredient Squash, or Bacon Chicken Alfredo recipes first.
  • PaleoPot.com - This is a blog dedicated completely to crock pot recipes, all Paleo, and amazing! I just tried their Sausage in Peppers recipe yesterday, and loved it... and tomorrow I'll be making one of their Butternut Squash recipes!
  • ThreeNewLeaves.com has an amazing Banana Bread recipe (and I made french toast with it the next morning, with just beating up some eggs, almond milk, vanilla, and cinnamon for batter). I haven't tried any of his other recipes yet, but am looking forward to doing so soon. 
  •  
 
Okay, friends, happy researching! Let me know if you're inspired or have questions about Paleo... I am no expert, but I may be able to at least point you in the right direction!
 
xoxo
Heidi


Wednesday, October 3, 2012

Greek Bean Soup Recipe

My neighbor made a soup like this for me a while back,
and I had to go home and make my own rendition of it!
This has been one of my favorite "comfort foods" of the fall
ever since!

Greek Bean Soup
 
Ingredients:
- 1/4 C. + 2 Tbsp EVOO
- 2 large carrots
- 2 Celery Sticks
- 1/2 Yellow Onion
- 2 (15 oz) cans of Navy Beans, or Great Northern Beans
- 1 (14 oz) can of Diced Tomatoes
- Salt & Pepper (I always use Trader Joe's Pink Himalayan Salt Crystals)
- Feta Cheese for garnish
 
Directions:
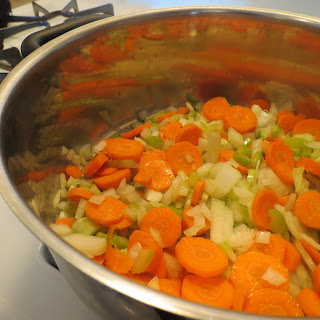
1. In a large stock pot, pour 2Tbsp EVOO, and add chopped carrots, celery, and onions.  Let simmer on a low heat setting until the onions are cooked through, about 2-3 min.
 
 
2. Rinse and drain beans.  They will bubble at first... rinse them until they stop bubbling.
 
 
3. Add your beans, tomatoes (NOT drained), remaining EVOO, and salt & pepper to taste.  Stir together.
 
4. Bring to a boil, cover, turn heat to med-low & let simmer for about 10 minutes.
 
5. Serve with (or without) Feta Cheese sprinkled over top.
 
 
Note:  This soup is not exactly "soupy"... meaning, it doesn't really have a broth, but it is a delicious, budget-friendly, quick way to throw something together! Another thing I love to do with it is to make a double batch.  After it cools I stick half of the "soup" into a freezer bag  for another date (or to send home to a mom with a new baby... or someone else who needs it more). It keeps in the freezer for months... so it's a nice thing to have around in your freezer on a night you need something quick.. just remember to put a date on it so you know when it was made. :)
 
Enjoy!
 
xoxo
Heidi 
 

Tuesday, October 2, 2012

"All Cleaned Up Roasted Pumpkin Seeds" Recipe


One of my favorite things to do in the fall is to stock up on Pie Pumpkins and save them for a rainy day! Today is not a rainy day (it's actually very sunny... and beautiful!), but I do have a couple of sick kiddos laying around the house.  So, I'm making the best of this day and cutting open my first Pie Pumpkin of the year!

When I was little we would roast pumpkin seeds with melted butter and lots of table salt.  It was one of our favorite fall pastimes & snacks.  However, now that I'm all grown up, I'm always looking for ways to make my favorite things, only healthier for the family & I... but still just as tasty & enjoyable!  So I was very excited to try roasting pumpkin seeds a new way today!

Two steps to prepare to roast your seeds:
Step One
So, first thing's first! You have to buy your pumpkin! Not sure what a "Pie Pumpkin" is? Click here!

Step Two
Okay, now that you have your pumpkin.... time to cut it open, and gut it! I love this part... I'm sick, I know. ;)  Take all your seeds and seperate them from all the guts, put them into a small strainer. And rinse!


Okay, now you're ready to roast your seeds!!


All Cleaned Up Roasted Pumpkin Seeds
Ingredients:
- Rinsed Pumpkin seeds from 1 Pie Pumpkin (about 1 cup of seeds or so)
- 2 tsp. of Coconut Oil
- approximately 1/8 - 1/4 tsp. Pink Himalayan Salt Crystals

Directions:
1. Begin preheating your oven to 300F. 
2. Line a large cookie sheet with parchment paper.
3. In a small microwave safe bowl melt Coconut Oil. 
4. Add your Pumpkin seeds to the bowl, and stir. 
5. Sprinkle salt evenly over the top, stir. 

I used Trader Joe's Pink Himalayan Salt Crystals,
and Spectrum brand Organic Coconut Oil for this recipe.
6. Spread mixture across your cookie sheet.
7. Bake for about 45 minutes. Seeds should be a light brown color when they're ready.

What your roasted seeds SHOULD look like when they're done!

*I stored mine in an air-tight container at room temp.  These should last about 2-3 days... if you don't gobble them all up in one sitting! ;)

Enjoy!

xoxo
Heidi

Sunday, September 30, 2012

Slow Cooker Apple Butter Recipe (Sugar Free!)


Well, fall is in full swing here in Washington! Last week I visited my sweet friend Amy, who took me apple picking in her yard straight from her beautiful apple tree with her!  I actually climbed to the top of the tree to get the most ripe apples I could find (this is a big deal for me... I'm a big baby about heights!).  And we picked about 30 apples for our Apple Butter making adventure.

For our first batch of Apple Butter, we followed this recipe that I found on Pinterest.  And while on the one hand it was absolutely delicious, on the other hand my nagging conscience had me stressing out about the amount of sugar that went into making this batch!  So, I set out to make our second batch without any sugar.  I searched and searched for a recipe online, but was not finding what I was looking for. So instead, I followed this guide on how to substitute sugar with Stevia, and I came up with my own spin off of the original recipe I followed.


Sugar Free Apple Butter

Ingredients
  • 13 Cups of Apples: peeled, cored, and sliced thin
  • 1 tsp Stevia Extract Powder (I used Trader Joe's brand)
  • 5 heaping Tbsp Raw Honey
  • 2 tsp Cinnamon
  • 1 1/2 tsp Nutmeg
  • 1 1/2 Cups (no sugar added) Apple Cider *you may need a little more to add to the mixture as it heats

Directions
Prepare your apples (I used a handy dandy Apple Peeler Corer Slicer!), put them in your crock pot.  Sprinkle Stevia, Cinnamon, Nutmeg, and Honey on top. Pour cider over top, and mix ingredients together. Turn crock pot on high and cook for 5-7 hours, and add more apple cider, if needed to reach desired consistency.  The butter should be boiling when you're ready to can.  I personally chose to can mine in 8oz jars. I followed the instructions in this video for canning with a water bath.

 
I love this recipe, because there's NO sugar!

However, because there is no sugar in this recipe, the consistency turns out more like an apple sauce than an apple butter (not as gewy as normal apple butter).  If you come up with a way to make the recipe without sugar (or crappy sweeteners like Splenda - yuck!) and get it to a better consistency, please let me know, I'd love to try your version!


Sunday, September 16, 2012

Treasure Basket: Baking

So far, I have made 2 baskets and have only used one.  So, I'm going to show you that one today.
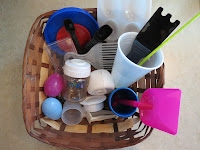
"Baking" Treasure Basket
What's in the Basket:
  • Whisk
  • Wooden stirring spoon
  • Pot holder
  • Mixing bowl & lid
  • Paper muffin liners
  • Foil stars
  • Measuring cups (1 glass, 1 plastic)
  • 2 Measuring spoons in individual sizes
  • I added a couple more items after this picture was taken:
  • A large metal stirring spoon
  • One of those food mashers, metal with a wooden handle
Kendrick had a blast playing with this, and lasted about 30 minutes (awesome, I did not expect him to be entertained that long!) just completely intrigued with everything inside!

You can see the masher, and the spoon that I added here.
He was so into what he was doing that he didn't even notice Mommy taking pictures!

What I like about these baskets is that while Kendrick is able to explore these items and learn about his senses, I am also able to sit down and play with him, and teach him while I do.  We discuss which items are bigger & smaller.  We made music with the spoons & things.  And we (I) talked about the differences in the textures and what each thing is used for in the kitchen.

This is definitely NOT something I will leave him unsupervised with.  He still likes to explore with his mouth quite a bit, and has come up with very creative ways to use some of the things that could be dangerous.  So, I recommend if you are thinking of making something like this to make sure to monitor your children closely with these!! :) 

If you would like to learn more about Treasure Baskets, and how to make them, click here!

Thank you for reading!!

xoxo
Heidi

You might also enjoy:

Treasure Baskets:
Getting Started

Treasure Baskets: Getting Started

As we began the school year this year, my first year "homeschooling" Kyla (4), I was not sure how I was going to include my 22 month old son, Kendrick, on our school days.  I started doing some research on some blogs... and this is what I found: Treasure Baskets!  Generally, Treasure Baskets can be used from the time a baby can sit up on their own, and grab things.  Kendricks baskets will be different from the kind of basket a 6-12 month old might use, as his will be aimed more for toddler age.

The idea behind the Treasure Basket is to include a variety of items in different shapes, colors, sizes, and textures.  This is to explore the sences, and can also be used to teach your child new things through play.

If you would like to create a Treasure Basket there are so many resources out there, with great ideas to get you started! Feel free to check out some of the places I've visited (keep reading to see). Don't be shy to get creative and think up your own ideas if you're contemplating! Or, you can just straight copy the ideas from these baskets.  The great thing here is that these are easy to make, and can be so cheap, or even FREE... because you should be able to find so many things around your home that will work for these!

"Plastics" Treasure Basket


Treasure Basket blog ideas to get you started:
If you're going to make a basket you should probably want to leave out any potentially dangerous items (you know the lighter, matches, needles, knives, windex, lead... stuff they can choke on, poison themselves with... or possibly burn themselves or the house down with).    SAFETY FIRST!  It is important to be near by and watching your child(ren) closely as they experiment with the items you put in their baskets.  I also read somewhere to make sure if you're going to add something leather in there to ensure that it's genuine leather, the fake stuff can be toxic.  Just use common sense, and if you're not sure, leave it out... or google it?

Anyway... in case you are wondering, I plan to make 1-2 new Treasure Baskets per week. I imagine I will most likely end up repeating some of the baskets and re-using alot of the materials in future baskets. I had fun searching the house high and low for basket fillers this week. And it actually got me organizing little spots in the house that had gone unnoticed (imagine that) for a while.

There really is SO MUCH you can do with these Treasure Baskets, and they can be such a great teaching tool if you want to get more involved. The great thing is that they are so versatile! If you make a Treasure Basket that you want to show off, share, or brag about, please email me pictures and a description, as I would love to feature you on my blog!

xoxo
Heidi

Wednesday, September 12, 2012

September Sensory Bins

This is the first time we've ever done Sensory Bins.  I plan to make a new one (or 2) every month.  They will most likely go along with the season.  I imagine that as I continue to make more I will learn to get more and more creative with what to put in them. These are a big hit with the kids so far, and I am happy to show you them!  Originally I was going to just make one a month, for Kyla (I thought Kendrick might be too young).  However, I realized that plan was incomplete, as soon as Kendrick noticed what she had going on! So, I decided to make 2 a month, and the kids will take turns playing with them.  This month they have the same basic items, just in different colors. 

Here is the first one I made:
Sensory Bin #1
And here is the 2nd:
Sensory Bin #2
What's inside the bins:
  • Scrunchy Confetti paper (I have no idea what the actual name for it is)
  • Styrophome Squashes
  • Fall colored slinkies
  • Colorful leaf foam stickers
  • Nylon leafs (I picked these off of stems from fake flowers)
  • Brown paper bag
  • Orange plastic pumpkins
  • 2 Polka dot print cloth ribbons
Everything inside these bins, excluding the ribbons, were found at my local Dollar Tree store.  The little bins were purchased at Wal-Mart.  And, I believe my sister bought the ribbons for me a couple years ago in the little dollar section in Target.

I'm looking forward to making more of these, and will be posting every month when I do! I got the idea for these on one of my favorite homeschooling blogs, Counting Coconuts!  If you have any questions, or ideas, please feel free to comment!

Thursday, September 6, 2012

Week 1 of Preschool at Home

So far, we're off to a great start for the year! We are easing our way into school gracefully, with just 2 short days this week.  We're following a schedule that has us working on one letter a week, one number a week, and a color of the month.   Anything beyond that we will start adding into the curriculum once we get the hang of the school days, and have a solid routine.

Letter of the week: A
Number of the week: 1
Color of the month: Red

I'm excited to share with you how we are approaching this!

Kyla is memorizing a verse of the Bible every week that goes along with the letter of the week. 

This week we used Psalm 17:8 "Keep me as the Apple of your eye."  Along with that, we incorporated lots of apple themed stuff to go along with the verse she is learning.  We discussed what kinds of things we can do with apples, and she helped me bake this Apple Chips recipe I found on Pinterest.  And, we're planning to bake Apple Pie together next week.  It's still a little too hot outside for the next few days for us to turn the oven on that high.


Another thing we did with the color red, and the number '1', was coloring this picture of a red
barn.  It had one horse in it, and she practiced tracing the number '1' on the bottom of the page.


With Kendrick, I'm still figuring out how to get him involved and learning things alongside Kyla, so that he feels a part of school.  He has a huge desire to be a part of everything she's doing, and is even trying to recite her Bible verse with her.  This week I let him color pictures of apples, talked with him also about the color red, and let him play with stickers.   I'm working on putting a couple of bins together with special learning items for Kendrick to play with during the school day, I will be posting this soon!


Kendrick had a little trouble getting the stickers apart from the paper, so I had to peel each of the stickers back a bit before giving him the sticker sheet.


Last, but not least, this cute little CD came as a gift from my sweet neighbor friend. This has all the letters and Bible verses we'll be working on through the year, along with a catchy little tune to help the kids have fun memorizing.  So, in the morning before we start our school day, the kids get all their wiggles out wihle listening to this in the livingroom.  They are both already starting to sing along.  So adorable! 

Tuesday, August 28, 2012

Summer to Fall

Fall is almost here full force, and I can feel it!  School begins just a week from tomorrow. For the last few weeks I have been taking time to lesson plan (homeschooling my youngest 2), create a new daily schedule, fill in the days in my calendar... etc.etc. Can I just say, I'm READY FOR FALL!!??

We have had an event-filled summer, and in the whirlwind have lost all sense of routine, planning, rhythm, bedtime... you name it! This mom has had fun, I admit, but the 'Type A' in me is just itching for life to get back into a routine again!

I must remind myself that even when things seem chaotic, we're creating life-long memories and traditions that the kids will remember forever (hopefully)!! So, I think I better do a re-cap some of the fun we got to have this Summer!

First fun thing:  a camping trip to Northern Idaho state to visit my grandparents, and play at Silverwood. Afterward, on our way home, we got to stay overnight in a hotel in Coeur d'Alene, Idaho, and reconnect with more family.

At Silverwood Theme Park

My Grandma & Papa, relaxing and watching the grandkids play.


- We had PLENTY of fun-filled days at the lake!!

- Lots of play dates at the park... and lots of play dates, period!

-  Picnics!

- An overnight trip to Grandma Gail & Grandpa Dan's (Micah's mom)

- A visit from our cousin Chiara

- Multiple day trips to Anacortes, Washington Park, and the Donut house!

- A couple of weddings, lots of baby showers, and quite a few new babies born to our close friends!

All-in-all, it has been quite a bit of fun!! Probably one of the best summers we've had so far! The kids are at such great ages, and all very enjoyable... so much easier to pack around now days!  What I will miss when the school year starts: having Cora's company around (we don't get as much time with her in the school year), laying in the sun, swimsuits, flip flops, being able to pack up and go to the park... and stay warm, and most of all having the option to be spontaneous more often!

Thursday, August 2, 2012

Committed!

Some of you may already know, last week I started week one of Insanity: The ASYLUM. Here's my Day 1 review on YouTube... feel free to watch, and leave comments or questions! :) 

What I hadn't taken into account is that I found out a couple of my friends were doing CrossFit workouts in their garage gym, and I'd been wanting to join them for a while! I loved the idea of getting some cross-training in and trying something new. So I did it! It was an amazing workout! But I was soooo sore (for like, the next 3 days!!).  My body was totally shocked from all the lifting, and I loved it!

However, this left me with a dilema... do I quit The ASYLUM, and start over later? Or, do I quit these CrossFit workouts and finish Asylum? I was not ok with either one of these options.  SO, here's my plan.  I'm going to keep with my Asylum calendar, and check off each day 1-30 as I go. Then, if I take a break in between for a CrossFit workout (I will take a day of rest the day after, if needed)... Afterward, I'll simply pick back up where I left off on my Asylum schedule.  Make sense?

30-Day Asylum Calendar (adjusted to fit in CrossFit workouts)

Now, I've come to understand there seems to be some controversy between CrossFit and at-home workout programs, like P90X, Insanity, etc. I'm not sure if I completely understand why... but I'm sure someone will fill me in at some point. I think both are great, and plan to use both. My Asylum calendar keeps me on track, leaving me with no guess-work to put into my workouts at home... and I need that, since I'm not always able to get out of the house and have someone watch my kids. When I go to Tim's Gym,  he tells us the workout plan for that day, there.  So for me, this is a win-win, and... it keeps things interesting!

Tim put together a 6-week training program for people to do CrossFit workouts from home, and I'm also planning to incorporate that in my schedule this Summer... I love the community aspect, knowing that other people are doing the same thing, it's free, and they can do it at home with no equipment. Check it out on his blog! 


I started it (1 week late) last night.  Did the "Baseline Test" with my kids on my street. It was pretty cute - they joined in.  I definitely could have done better, was distracted some with the kids, but I did it nonetheless!

(And the kids attempted to join me!  Cora even ran 100m sprints with me!)
How did I do? Here you have it folks:
WOD1: 22.4, 8rds, 5pushups, 8situps, 2:09
The squats were killer! And there is only room for improvement here!

Cora (9) took my photo while doing the hand release push ups

If you decide to do the "Baseline Test," here are a few videos you might want to check out, so that you know what you're doing:
Also, you can download the "gymboss" app to your Android or iPhone for free, to time everything. It's super easy to use!

With all that said, I'm super excited to be getting involved with these CrossFit workouts, along with my Asylum schedule. I enjoy both of them a ton, and find it fun to get to choose which workout I'm going to do each day!


Saturday, July 28, 2012

Coffee!!!!!!!!!!!!

Well, this last week started off LAZY, after our vacation last week in Idaho.  It took me about a full week to recover after coming home! But it was worth every ounce of our energy. We made some amazing memories, and the kids had a blast!

On Tuesday morning, I was watching some Backyardigans with the kids in the livingroom {our new FAVORITE show!}, when I heard a noise coming from the kitchen.  At first I thought Micah (my hubby) was awake, as it sounded like he was pouring a cup of coffee.  Then I realized that my 20-month-old son was no longer in the room with me. So, I headed in to the kitchen to  find out what was up. I was in complete shock when I figured out what I was hearing... I was right, someone WAS pouring a cup of coffee... but it was NOT my husband, it was Kendrick (my son)!!! He had pulled a chair out from the kitchen table, over to the counter; climbed on the chair, grabbed a coffee mug, and poured himself a cup of Jo! No joke! So, I had to get a photo for the memory, of course. After all, he'd only spilled just a little bit.


So I cleaned up the mess, put the chair away, and brought my dissappointed boy back to the livingroom.  He REALLY wanted that coffee!! As soon as I was distracted again, I started to hear the same sound. This time, I decided to record what I was seeing on video. I figured if he did it once, he'd probably be just fine doing it again, although... as I watched, it took everything in me not to jump over and try to save him. I was convinced he would spill, or drop the cup and break it all over the floor. But, once again, my son surprised me all over again. You must see this video!


Can you even believe that? Cracks me up every time I watch it. Micah and I loved how he started to pour, and then put the coffee pot down to re-adjust the cup before he actually poured.  We may need to switch this coffee pot to decaf only - and get a secret pot for Daddy and Mommy to use... Shhh!! ;)

I'm thinking this would be a great coffee commercial!! I'd buy from that coffee company for sure!

Thursday, June 28, 2012

So... You Want to Run a Half Marathon?


I have had quite a few of my friends express an interest in running, and in the same sentence tell me they're  "not athletic" like me... so they never could.  Uhhhh.... ARE YOU CRAZY??? Yea, I'm serious, I'm not the crazy one here - YOU ARE!

I am always baffled when I hear this statement, for a couple reasons:

1. first of all, I KNOW that most of them actually CAN, they're just puting limits on their abilities (probably stemming from some kind of fear of failure, if I had to guess from my own experience)!

2. And second of all, because, well, growing up... I was not someone you'd EVER find on a sports team, or running for pleasure.  I was not interested in even trying to run, because I didn't see the point. 

So, what I'm trying to say is that I really believe that ANYONE (without any major injuries) can make themselves a "runner".  It's just a matter of deciding if they WANT to or not!

MY STORY.... (stay tuned for step-by-step instructions on becomming a "runner").  I found myself taking interest in running shortly after my son was born, when I was ready to get in shape again. And I wanted a short-term goal to work toward.  So, I decided that running a half marathon would be it.... and, let me tell you, it was SO rewarding, crossing that finish line!


My dad and I at the finish line! SUCCESS!!


I'm telling you right now - if you want to conquer a race, whether it be the full Marathon, or a 5k... all you have to do is DECIDE you're going to do it!  There are so many great resources out there! So let me tell you where to start:

1. Go to www.halhigdon.com and research your options.  Figure out which training schedule fits you best for your goal race. 

2. Google races in the area you want to run one. 
Example: If I want to run a Half Marathon in Seattle, that is what I put in the google search: "Half Marathons in Seattle".

3. Choose your race.  Make sure you allow yourself as many weeks as your training schedule requires.

4. Schedule your training. Put it on your calendar, or in your smart phone, or iPhone... set alarms, whatever you need to do.  And stick to it! 

5. Don't Worry. There will most likely be days that life gets in the way, you catch a cold, or the kids get the flu... and you can't get your run in.  This is just par for the course. Make it up the next day, or if it's  one of your shorter runs, just let it go.  Long runs are the important ones not to miss, so if you must, just  make it up another day, and make sure to give yourself a rest day the next day.

6. Have FUN! If this is your first race, or you're just getting back into running again... remember to enjoy it.  This is your time alone, to center, to do whatever it is that you do during your runs. Some days it will seem more like a pain than a positive thing, but on those days, you can remind yourself that you're doing this for YOU, you're making yourself healthier, and pushing your physical and mental limits! And you're about to conquer a race like a warrior because of it!

 Now that you've decided to be a runner... get excited!! Read runner's blogs.. or purchase a "Runner's World" magazine... learn from the experts cool tricks and tips while you're getting ready for your big race!


Leave me a comment if you decide to sign up for a race, or take up running!
I'd love to hear your story!!

xoxo
Heidi